Friday, July 18, 2014

Muga Ghashi ( Sprouted Moong beans in coconut sauce)


Muga ghashi is a favorite in konkani households. It is my mother's all-time favorite. She pretty much makes it every other week. So what exactly is this dish? "Mugu" is moong beans in konkani and "ghashi" refers to the kind of coconut sauce it is in. Mugu here spegifically refers to the sprouted moong beans that are so tiny to begin with. Think of the sheer amount of work that it takes to peel each single one if them! I know of only one person who diligently does it! Who?? My mother of course!! She will sit and patiently peel each and every one of them! Can you believe that?? Well she does! This is the deal with her. She does not like a single moong bean peel in her muga ghashi. You will never see a hint of green in her muga ghashi. Now are you wondering if I have taken over my mother's skills?? NO! I could not have such patience in a million years!! I have adopted my mother-in-law's policy. Cook the sprouted moong with the peel! Ha ha! And to think that I used to hesitate to make this favorite dish of mine just thinking about the sheer amount of work! Now I get some fiber too in my diet:). When you cook the sprouts in water, the peel floats up top. You can scoop the peel and remove it. Whatever peel is left, you eat. But the authentic way to make this dish is by removing the individual peel from all the moong beans. Remember, your mother is always right!

Now, for this dish you could add any of the following as an accompaniment: suran( yam), keerlu( tender bamboo shoots), bikand(jackfruit seed),kook( chinese potato), cauliflower, tendle( gherkin), simebadane( chayote) or even potato. Each one gives the dish a nice unique taste. My favorite is with the tender bamboo shoots and with Chinese potatoes. Today, I will share with you the dish I made by combining sprouted moong beans with tender bamboo shoots.


Servings: 4-6


Ingredients:


Sprouted moong beans: 3 cups
Tender bamboo shoots: 1 cup, cleaned and chopped into medium pieces.
Salt to taste.
Water: 2 cups + 1 cup

For the coconut masala/gravy/ sauce:

Grated fresh coconut: 1 cup
Dry Red chillies:4-5 nos ( depends on the spice level of; the chilly).
Tamarind: marble sized if dry, 1/2tsp if pulp.
Water: 3/4 cup( can add more if needed)

For tempering:Mustard seeds: 1 tsp
Curry leaves: 1 sprig
Coconut oil: 1 tsp ( any cooking oil can be used.)

Method:


Grind all the ingredients listed under coconut gravy and keep aside.


Cook sprouted moong beans with 2 cups water in a pot on medium flame until tender. Generally around 20-25 minutes. Keep aside.


Cook tender bamboo shoots with 1/2 cup water in a pot until tender.Around 8-10 minutes. Keep aside.


When all the above are ready, mix it all together in pot big enough to hold it all. Now place it on medium heat and bring it to a boil. Once boiled, switch of the flame. Temper with the ingredients listed under tempering.

Tempering:

In a small frying pan, heat coconut oil, add mustard seeds. Once the mustard seeds splutter, add the curry leaves.Add it to the above pot.


Note: some people add 1/4 tsp jeera( cumin seeds) to the tempering.

Some people temper with fried chopped onions. I prefer the taste of mustard and curry leaves.

Serve hot with rice.

Enjoy!


Cooking made easy:


One of the easy ways to peel the skin off the sprouted moong beans is by soaking it in water. Soak the sprouts in cold water for 3-4 hours. You will see the the peel separates from the seeds and floats up on top. Scoop it up. There might be a few stubborn ones that might be required to be manually peeled.

Tip for healthy living:


Sprouts are very nutrient-dense.Apparently the quality of the protein, the fiber content, essential fatty acid content  and vitamin content in the beans improves upon sprouting. There are 100 times more enzymes in sprouts than uncooked fruits and vegetables.They are easy to make at home, and are by far the best locally-grown food.
References:
http://www.care2.com/greenliving/10-reasons-to-eat-sprouts.html
http://www.sprouts-as-medicine.com/
http://articles.mercola.com/sites/articles/archive/2013/04/08/eating-sprouts.aspx

Food for thought:


Absence- that common cure of love. Lord Byron

Thursday, July 17, 2014

Paper Masala Dosa ( Gluten-free stuffed Crepe)


The ambition of anybody who loves making and eating Masala Dosa is to get it to be crispier and more perfect than before.For those who don't know about "masala dosa", "masala" means stuffing and "dosa" means crepe.Basically it is stuffed crispy crepe. But in this case, the crepe is paper-thin! While my Masala Dosas come out well, a few months ago I came across this recipe for Paper Masala Dosa. The batter was different from what I made and used several different types of dal. I was intrigued. Not just for the concept of having a crispier, thinner dosa but due to the use of multiple lentils. I am always looking for ways to make my kids meals protein-rich and this seemed to be perfect! Even if the dosas didn't turn crispy, I still would have healthy dosas for my kids. They love dosas. Well, the dosas came out perfect! I absolutely fell in love with them. The recipe was shared by an innovative cook, one of my favorites Seema D.Shenoy. She has a Facebook page called DineDivine.

Servings: 6


Ingredients:


For the Dosa batter:
Rice: 2 cups
Urad dal: 1/4 cup
Chana dal: 1/4 cup
Moong dal: 1/4 cup
Tur dal:1/4 cup
Methi ( fenugreek) seeds: 1 tsp
Soak all above ingredients in water for 5-6hours.
Water: to grind the batter.
Salt: to taste

For the bhaji (stuffing):

Potatoes : 3 medium
Onion: 1 big, chopped small.
Green chillies: 2 slit lengthwise
Mustard seeds: 1/2 tsp
Urad dal: 1/2 tsp
Chana dal: 1/2 tsp
Jeera(cumin): 1/4 tsp
Haldi( turmeric powder):1/2 tsp
Curry leaves: 1 sprig
Oil: 1 tbsp
Cilantro ( coriander leaves) 5-6 sprigs
Salt to taste

For the chutney:

Grated fresh coconut: 1 cup
Green chilli: 1
Red chilli ( dry): 2
Ginger: 1/4 inch
Tamarind: marble sized
Chana dal: 1 tsp
Oil: 2 drops for saut�ing
Salt to taste


Method:


For the dosa batter:

Grind all the ingredients  listed under dosa batter to a fine paste. The batter should not be runny. Let it ferment for at-least 8 hours or overnight.

Next morning just before making the dosa, add salt to taste. Mix well.

The stuffing( bhaji):

Boil potatoes till tender. When cooled, peel and dice it into 1cm cubes and keep aside.

Heat a kadai/ saut� pan on medium heat. Add oil,temper mustard seeds. The add curry leaves, jeera,chana dal, urad dal one after the other and saut� till urad dal turns a little golden brown. Now add the slit green chillies and the chopped onions. Saut� until onions turn transparent. Now add haldi and saut� for 1 more min. Add the diced potatoes and saut� for 2-3 mins. Garnish with finely chopped cilantro leaves.

The chutney:
Saut� chana dal in one drop of oil until golden brown. When cooled, grind it together with grated coconut, green chilli, red chili, ginger,tamarind, salt and water into a thick paste.

Putting the  Paper Masala Dosa together:
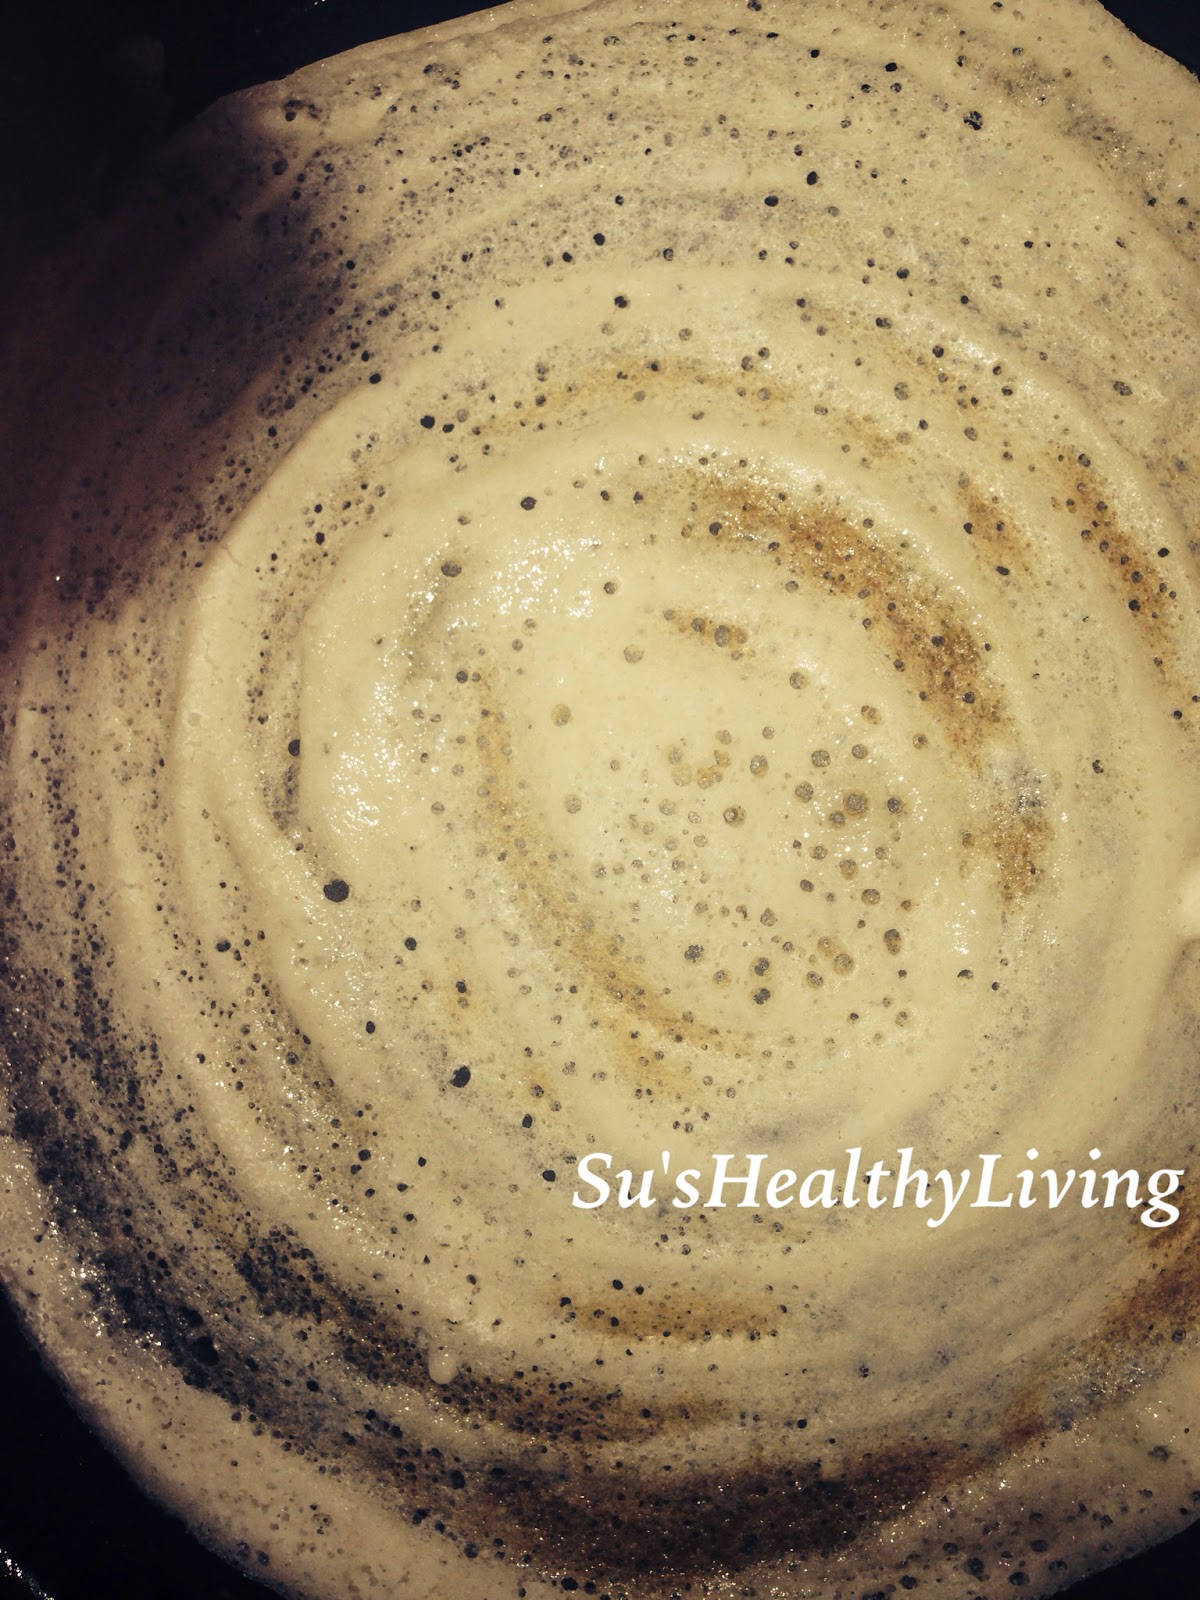
Heat the skillet/tawa/griddle on medium-high flame. When the skillet is hot, sprinkle cold water. Take a ladle of dosa batter and go in concentric circles from the center to the periphery of the skillet.


When the dosa is slightly done lightly smear oil along the edges and the center of the dosa. Wait for it to turn crispy. 


Once this happens, smear the red chutney at the center of the dosa and place a tbsp of the potato bhaji. 


Now fold the dosa into a roll as shown in the picture.This dosa is cooked only from one side and is not flipped.

Serve hot with any chutney of your choice and  sambar. I have served with just  ridge-gourd peel chutney in the first and radish sambar in the second. 


Enjoy!


Cooking made easy:


Always make extra batter enough for 2 breakfasts.The above dosa batter can be used to make plain paper dosa the next time. Serve it with chutney of your choice.

You can also be versatile with the stuffing you make. You could use mushroom bhaji or paneer stuffing.

Tip for healthy living:


Fermented foods are a good source of probiotics. Probiotics are needed to promote good health of the gastrointestinal system. Probiotics are the good bacteria in the intestine that help digestion and prevent bloating, constipation and diarrhea.Good sources of probiotics include yogurt, kimchi, saurkert etc.
References:
http://www.medicalnewstoday.com/articles/264721.php
http://www.health.harvard.edu/fhg/updates/update0905c.shtml
http://www.webmd.com/digestive-disorders/features/what-are-probiotics
http://foodmatters.tv/articles-1/6-healing-benefits-of-probiotics


Food for thought:


Laughter is the best medicine.(unknown).

Saturday, July 12, 2014

Ragi Neer dosa/ Ragi paan polo/ Finger Millet Crepe


It is party time again at Fiesta Friday!This week I am bringing yet another healthy gluten-free crepe to the party.I hope Angie the host of Fiesta Friday and her wonderful co-hosts this week, Indu@ Indu's InternationalKitchenSelma@ Selma's Table and Hilda@ Along The Grapevine, and all the other fellow party-goers like it!


Paan polo or Neer dosa/ Rice crepe is my go-to when I want to prepare dosas instantly and have not planned for it. This happens if I have not ground the dosa batter a day ahead and left it to ferment because I had a busy week or sometimes just plain forgot! The good thing about Paan polo/ Neer dosa is that the batter does not need fermentation! The rice could be soaked for as less as one hour in hot water. Or even better, just use rice flour! Something interesting happened recently.. I came across a recipe online that used Ragi flour( finger millet) for Paan pole. I was intrigued. I decided to try it and you know what?? It was delicious! The recipe is super easy and with Ragi( finger millet) being a healthier gluten-free grain, it is actually good for the body. I was thrilled!Of course, I tweaked the recipe to my liking. I use Ragi flour periodically with mediocre results but this was fantastic. I have made this several times now and have liked it each time! If you are looking for healthier ways to eat.. This is one of it!

Servings: 4


Ingredients:


Raagi ( finger millet) flour: 1 cup
Jeera ( cumin seeds): 1/4 tsp( optional)
Water: 3 cups+ 2 cups
Salt: as per taste
Oil: for greasing the skillet/griddle( I use coconut oil). You could use any cooking oil.

Method:


Mix Ragi/finger millet flour with 3 cups water. Keep aside for 15 mins.


After 15 mins, discard the top water and the dark  Raagi husk until you reach the lighter sediment.


Now add 2 more cups of water and salt and blend it for 30 seconds, using a hand blender or using a regular blender. Blending ensures that you get a nice homogenous batter. The batter should be thin and free-flowing.


Add the cumin seeds to the batter. You could skip the cumin seeds if you don't care for the taste of cumin.

Heat a griddle/ skillet on medium heat.Grease the skillet/ griddle liberally with coconut oil. 

When the griddle is hot, take a ladleful of batter and pour it from out to in. This batter cannot be spread. It needs to be poured. Instead of the ladle you could use a small cup or soup ladle to pour the batter.


The batter hisses and spreads like a lace on the griddle. It cooks very quickly. When cooked, fold it into a triangle.


Remove and keep it in a hot box ( something like a tortilla box).

Serve hot with a chutney of your choice.


My kids like it with a dollop of butter and some honey or jaggery syrup:).

Enjoy!

Cooking made easy:


The trick to making good dosas and the dosas not sticking to your skillet/griddle is by ensuring that it is greased well. Also, for Neer dosa the temperature of the griddle has to be maintained hot throughout.You cannot lower the flame.

Try to use separate griddles/ tawa/skillet for dosa and chapatis. My experience has shown that roasting chapatis on the dosa tawa spoils the seasoning of the tawa and makes it more probable that when you try to make dosas, they stick to the skillet leaving a sticky mess.

Always, always be gentle while cleaning your skillet/ tawa. Do not use harsh scrubs or strong detergents. This again messes up the seasoning of the skillet/griddle/tawa.


Tip for healthy living:


Ragi/ finger millet is a healthy grain that is gluten free and is a great alternative to wheat. For time immemorial, finger millet has been a staple part of the diet of residents of Karnataka, a South Indian state. Karnataka happens to produce 58% of the Ragi grown in India.

Ragi is one of the few grains that does not need to be polished and therefore is minimally processed. Ragi is a great source of protein, calcium and iron, hence very important for vegetarians and vegans. It has the highest percentage of protien when compared to other grains. It naturally is low in fat and high in dietary fiber due to the presence of it's bran. It is great alternative for rice and wheat for diabetics as it has a low glycemic index an therefore maintains the sugar levels stable for a longer period of time. Bottom-line, it is a very good food item that is beneficial for almost everyone!

References:
http://www.supraorganics.com/finger-millets-benefits.php
http://www.thehealthsite.com/fitness/did-you-know-these-10-health-benefits-of-ragi-or-nachni/


Food for thought:


A man must not deny his manifest abilities, for that is to evade his obligations. William Feather

Wednesday, July 9, 2014

Loshne/ Lasun Chutney Powder( Garlic Chutney Powder)


Amongst the dry chutneys or chutney powders as we call them, one of my favorites is Loshne/Lasun/ Garlic Chutney Powder. May be it is spicy and tangy and has the yummy garlic flavor locked in ... or may be it is because I have a lot of childhood memories associated with it... My mother always kept a batch of dry garlic chutney in the pantry. Her chutney will keep you asking for more. Mine does not match up to hers:(( even though my husband likes it :)). I just made a batch recently. This one was unplanned. Every week my husband brings 2 fresh coconuts which I then grate . I use a portion of it to make fresh masala an freeze the rest for later use in masalas and stir-fries. This time one of the coconuts was a little rancid. When I told my mother this, she said " why don't you make Loshne chutney. Just make sure that you fry the coconut well". I decided to just that and ended up with a bottle of fresh, tangy, yummy chutney to be used for the next couple of weeks.You could never tell that it was made from coconut that was a little rancid. Of course, this can be made out of any kind of shredded coconut;fresh, dry,dessicated, any kind as long as it is coconut.But it is also a good way of making use of the slightly rancid coconut which cannot be used as curry bases or sauce.


Servings: makes around 16 oz chutney powder.


Ingredients:


Freshly Shredded coconut: from 1 coconut (around 4 cups)
Garlic: 2 pods ( about 30 garlic cloves)
Red Chilli powder: 1 tbsp ( if using whole red chillies, around 15 chillies)
Amchur (Dry mango) powder: 1 1/2 tbsp
Salt: 1 tbsp

Method:


Dry roast the coconut in a thick-bottom vessel/ pot until golden brown on low flame stirring intermittently . The coconut should dry completely,but be careful not to burn it. If using slightly rancid coconut, the rancid smell should disappear upon drying. When done keep it aside in a bowl to cool down.


Now in the same pan dry roast the garlic until slightly golden and you smell the aroma of garlic. Keep it aside to cool down.

Now dry roast the salt, amchur powder for 3-4 mins on low heat. Add the chilli powder towards the end and dry roast it for 1-2 mins. Make sure not to burn the chilli powder.


In a mixer/ food processor/blender separately powder the coconut into a fine powder. Pour this into a mixing bowl.

Now powder the roasted garlic in the blender as finely as possible.The garlic will be a little sticky. Separate it with a fork/ hand and add it into the mixing bowl.


Using your hand thoroughly mix the garlic and the coconut.

Now add the roasted salt, chilli powder and amchur powder to the mixing bowl. Mix well using a spoon.


The chutney is ready!


Store in a clean, dry, airtight container/ jar. Can be stored at room temperature for upto 2 weeks but for almost a month in the refrigerator.


Serve with dosa/ idli/ rice.

Enjoy!

Cooking made easy:


For the above recipe, instead of dry roasting the fresh grated coconut, you could just use the dry dessicated coconut. If you do use the dry one, you only need to dry roast it just a little bit.

You could use dried tamarind pulp instead of amchur, in which case you will have to grind it with the garlic.Amchur makes life easier :)


Tip for healthy living:


For time immemorial , garlic has been purported to have disease-fighting properties in the human body. Therefore it has been used to fight infectious diseases. Garlic is supposed to have beneficial effects on the cardio-vascular system and useful in conditions like high blood pressure, heart disease and cholesterol. Garlic is also supposed to help prevent certain cancers .Raw garlic is apparently more effective than cooked.

The beneficial properties of garlic majorly are from its sulfur-containing compound called "allicin", which gives garlic it's characteristic smell. Allicin when digested in the body produces sulfenic acid , that reacts with the dangerous free radicals in the body.
References:
http://articles.mercola.com/sites/articles/archive/2013/09/23/garlic-health-benefits.aspx
http://well.blogs.nytimes.com/2007/10/15/unlocking-the-benefits-of-garlic/
http://www.medicalnewstoday.com/articles/265853.php

Food for thought:


Choose a job you will love, and you will never have to work a day in your life. Confucius

Monday, July 7, 2014

Meatless Monday Zesty Arugula-Quinoa Salad with Parmesan Cheese

The concept of eating healthy is akin to married men remaining faithful to one woman. Everyone knows that it is the right thing to do but secretly covets another woman. Think about it.. and you will find evidence everywhere..


That's my rant for the day. Let's now  get back to eating healthy. On July 4 th, we went over to my friend's place to watch fireworks from her terrace. I wanted to make a salad for her as she too wants to "eat healthy".
So that afternoon when I went to the farmer's market, I bought some arugula, fresh radish and some fruits. Being that it was Friday, it was laundry day and I had to get that done before leaving to their house. By the time I got that done and gave the kids their dinner , I had just enough time to wash an dry the arugula leaves. Back it went into the fridge. I just packed the washed fruits in a nice little box and took it for her. Guess what we had for dinner??? Chinese!!!! Luckily her thoughtful husband ordered some Chow fun with lots of vegetables for me with some eggplant dish. Funnily, we thoroughly enjoyed the rice noodles!

So there was the arugula sitting in my fridge, which I decided had to be demolished tonight or else it was going to go bad. I hate to waste good food! I sliced up red radish, diced some cucumber, chopped a few apricots,added leftover quinoa, made a lime dressing and topped it with some toasted almonds, cranberries and Parmesan cheese. Voila! A wholesome dinner was ready!


Now the recipe in detail:

Servings: 2


Ingredients:


Arugula: 1 small bunch, washed & ,leaves separated.
Cooked Quinoa: 1 cup
Red radish: 3 medium sized, cleaned,sliced thin.
Cucumber: 1 medium, peeled and diced.
Apricots: 4, sliced lengthwise
Lime juice: 3/4tbsp, from one small lime.
Rice vinegar: 1/2 tbsp
Olive oil: 4 tbsp( I used extra virgin)
Sea Salt: 1/8 tsp
Black pepper powder: 1/4 tsp, freshly ground.
Parmesan cheese: 2 tbsp, grated/ powdered.
Almonds: 2 tbsp,toasted and slivered.
Craisins: 2 tbsp.

Method:


In a salad bowl, take arugula leaves, cooked quinoa, diced cucumber, sliced radish and apricots.

In a small jar, take  lime juice, rice vinegar,olive oil, salt & pepper . Close the jar and shake well.Add this to the salad and mix well.

Top it with Parmesan cheese, slivered almonds and cranberries.


Serve immediately.


Cooking made easy:


This salad can be served by layering the ingredients: make a bed of arugula, place the quinoa on top, then the cucumbers and radish , pour the dressing and  top it with apricot, almond, cranberries and Parmesan cheese.

If the marinade is mixed in the salad, it is best to serve the salad immediately for this kind of salads. The other option is to serve the dressing on the side.

You could substitute strawberries for the apricots ,walnuts for the almonds and feta cheese /blue cheese instead of Parmesan cheese.

Tip for healthy living:


Salads are healthy only as long as the dressing is healthy. Eating a salad defeats the purpose if you top it with calorie-rich dressings like ranch, Caesar, blue cheese etc. Opt for a simple low calorie dressing like some kind of vinaigrette or basic lemon juice-olive oil dressing.
References:
http://www.fatsecret.com/calories-nutrition/food/salad-dressing
http://calorielab.com/brands/salad-dressing/132


Food for thought:


Great minds discuss ideas; average minds discuss events; small minds discuss people. Eleanor Roosevelt

Saturday, July 5, 2014

Mushti Polo/Dosa ( Gluten-free vegan Indian pancakes)


This post was originally not intended for Fiesta Friday but after reading this week's co-host Sylvia @ Superfoodista.com, I am going to take this dosa/pancake to Fiesta Friday!.This will spread the message of gluten-free eating options that has been always available..


Mushti polo literally translates into "fist dosa" in English. "Mushti" means fist and "polo" means dosa. Why? I don't know? May be because they used their fists for measuring? According to my mother, they put the batter in the center of the griddle/skillet like a fist and let it spread. I, of course, spread it a little as I don't want it too thick!


Anyways, Mushti polo is a common dosa/ pancake made in Gowda Saraswat Brahmin households of South Canara region of India. It is a soft, fluffy and light dosa that melts in your mouth. There are a few variations in the batter with some using grated coconut in it and most using cooking soda ( soda bicarbonate) for fermentation. My mother never used soda bicarbonate in any of her cooking as she always believed that the use of it would cause bloating. I have learnt from her and I too avoid soda bicarbonate in my cooking ( except for cakes and breads). So here is my recipe for "Mushti polo":


Servings: 6-8


Ingredients:


Raw rice: 3 cups
Urad dal: 1 fistful
Methi seeds( fenugreek seeds): 1 tbsp
Poha( beaten rice): 1 fistful
Salt: 2 tsp
Water: for soaking and grinding

Method:


Soak 4-5 hours or overnight ,3 cups rice with 1 fistful of urad dal, 1tbsp methi seeds.

Next morning grind the above mixture with just enough water to make a batter with fine texture.

Soak 1 fistful of poha/beaten rice in water for 10-15 mins. Add it to the above ground mixture and pulse once or twice.The batter should be thick.


Pour everything in a bowl. Let it ferment for 6-8 hours or overnight.

Heat a tawa/ griddle, smear oil, spread out a ladleful of batter thickly. Cover and cook on very low flame until done.Do not flip the dosa. This dosa needs to be cooked only from one side.


Serve hot with chutney of your choice.In the picture below I have served the dosa with wet ridge-gourd peel chutney ( ghosale sheere chutney) and dry garlic chutney powder ( lasun/loshne chutney)


My kids love it with butter and a dash of honey!

Enjoy!


Cooking made easy:


If using non-stick saut� pans, skillet and griddle for cooking, use only wooden spoons/ spatulas on it. Using metal spoon/ spatula can scrape of the non-stick coating of the pan.

Use lukewarm water to wash non-stick cookware.While washing non-stick pans, use soft, non-abrasive sponge. Coarse fibers/ scrub can again damage and scrape off the non-stick coating.

Tip for healthy living:


Try and avoid the use of non-stick cookware in your kitchen.The non-stick cookware is coated with Teflon. The chemical name for Teflon is Polytetrafluorethylene(PTFE).The possible problems that arise are mainly from another chemical used in making Teflon,Perflurooctanoic acid ( PFOA) that has been linked with possibly causing cancer, hypothyroidism and reduced fertility. Do not heat empty cookware and never at very high-temperatures.The Teflon when heated to high temperature can release toxic fumes that are harmful to the body and can cause flu-like symptoms.

Discard any non-stick cookware that has it's coating scraped off or worn off.
References: