Friday, September 12, 2014

100th post: Ghee ( Clarified butter)


This is my hundredth post! I truly cannot believe that I have completed 100 posts on my blog!!! That too in less than nine months! To many bloggers out there, this may not be a big deal... But for me, it is! I never thought I would come this far! Like I have said before, blogging is hard work. Hats off to all the wonderful food bloggers out there who take the time to take pictures of their food and write about it. For me, as a working mom, it has been really hard to take the time to do my posts. I have had to stay up late after the kids have been cajoled into bed, wake up during the wee hours of the morning just to complete a post or to post something on time. The good part of it is the appreciation I have received from family and friends, recognition by many different organizations, making new friends with the wonderful people from the blogging world and last but not the least the immense amount of learning that occurs on a daily basis, in more ways than one!

I have given much thought to what I would write about for my hundredth post. I finally decided to go with something that is part of basic cooking skills: ghee or clarified butter. This is such an integral part of Indian cooking. Ghee that is sold at premium rates in stores like Trader's Joe, Whole Food etc. Did you know that ghee can be easily made at home?? All you need is butter! As simple as that. For time immemorial, ghee has been made at home in Indian households. I remember my mother collecting cream from boiled and cooled milk, storing it in the fridge, churning it and making butter and then converting that butter into ghee.

Let me share this simple method of making this liquid gold at home that is totally natural without any added preservatives or chemicals in it.


Servings: yields approzimately 700 ml of ghee.


Ingredient:


Unsalted Butter( sweet cream butter): 3 lbs

Method:


Take the butter in a thick-bottomed pot. 


Heat it on medium heat until it is completely melted.


 Once it melts, reduce the flame to the lowest possible and let it boil.


 It will start frothing. Continue boiling, stirring in between until the frothing stops, generally around 30-40 minutes. 


The liquid now is golden with a slightly dark residue at the bottom. Stop boiling at this point. Switch off the flame. 


Boiling any further will burn the milk solids that has separated and settled at the bottom .This will turn the color of the ghee brown instead of golden. 

Once the ghee has settled down/ cooled down a little, strain and pour it in a airtight container of your choice to be stored, ideally a glass jar of some kind. 


The dark residue will be left behind.


Can be stored at room temperature. Remains fresh for a month.I am bringing this to all my wonderful friends at Angie's Fiesta Friday. This week's co-hosts are Andrea@cooking with a wallflower and Sylvia@superfoodista.I look forward to these parties ...it is so much fun.If you haven't yet been there you should try it!

Cooking made easy:


Many people suggest the addition of clove, cinnamon stick, beetle-nut leaf during the last stage of ghee preparation to make it more aromatic. I sometimes add it. It is not a must. My mother sprinkles a little buttermilk when the bubbling has stopped and it has turned golden.  This also is supposed to make the ghee very aromatic.

Tip for healthy living:


For time immemorial, ghee has been use in everyday  Indian cooking. However over the years, people have shied away from ghee believing it to be fattening and rich in cholesterol thereby leading to heart-issues. Today how here butter is being promoted, ghee too is being promoted. Like anything else, anything when consumed in moderation does not cause ill effects on the body . Too much of anything is bad for the body. My kids are vegetarian an picky eaters. Hence I make sure I use ample amount of ghee in their food.
References:
http://www.ancientorganics.com/about-our-ghee/
http://creationbasedhealth.com/benefits-ghee-clarified-butter/
http://www.care2.com/greenliving/15-amazing-benefits-of-ghee.html

Food for thought:


The fewer the facts, the stronger the opinion. Arnold H. Glasow

Thursday, September 11, 2014

Khubbo Ani Waali Randayi ( Clams and spinach curried in spicy coconut-based sauce)


I love love love seafood. You name it, I like it. Of course, the regular stuff.. not eels and sea-urchin and stuff like that. My mother recently posted a picture of the clam and spinach curry that she made. It made me so nostalgic and I had such a craving for clams that I went to the fish market, got fresh clams and spinach and made it right away. Clams mixed with Malbar spinach ( Waali) is a classic traditional konkani dish. The mere aroma of it will leave one drooling.. That on a bed of rice is sheer heaven! I had not bought for several years now. When I went to the fish market I found these huge clams for a great price. Needless to say, I was thrilled. I bought half-a-dozen and cooked it for dinner right away! Did I relish every bit.. Hmmm.. Yum, yum, yum!! Sometimes, happiness is in the simplest things!


Servings: 4


Ingredients:


Clams: 6-7 if big, 30-40 if small.
Spinach: one bunch, cleaned and chopped.
Freshly grated coconut: 2 cups( 1/2 grated coconut)
Dried Red chillies: 4-6 ( adjust according to your spice level)
Tamarind: marble size
Haldi( turmeric powder): 1/2 tsp
Asofoetida( hing): pinch if powder( 1 tsp if solution).
Coconut oil: 1 tsp
Salt: to taste

Method:


Boil the clams with 1/4 cup water for 5-8 minutes or until the shells slightly open up. Remove the flesh, clean it and keep aside in a bowl.

Drain the water used to boiling the clams to get rid of any sand in it.

Add this water to the shellfish in a pot with the cleaned and chopped spinach. Cook it on medium flame until it is tender( 8-10mins). Keep aside.

Using a blender, grind together freshly grated coconut, red chillies, tamarind, little water and haldi to a fine paste.

Add this to the pot containing the cooked clams and spinach. Add salt and asofoetida and bring it to a boil.

Turn off the flame. Drizzle a little raw coconut oil on top.


Serve hot with steamed rice/ idlis/bread/ roti.

Enjoy!

Cooking made easy:


While picking clams at the fish market, look for ones whose shells are unopened. They are fresher.

Clams can be opened without boiling,using a pairing knife. This for me is time consuming. Boiling it for few minutes automatically opens the shells an is easier to handle.

Make sure that the clams are cleaned thoroughly not only from sand and dirt, but the flesh needs to be cleaned as well. Take off the black gooey part in the flesh of the clams and discard. If you don't do this you could end up with an upset stomach.

Cooking clams well also helps prevent an upset stomach.

Tip for healthy living:


Asofoetida or hing as it is known  in India is a spice that has been traditionally used in Indian cooking for hundreds of years now.It is the dried latex exuded from the tap root of Ferula, a perennial herb that is native to Iran, Afghanistan and India. It has a strong smell but when added to cooked dishes imparts a delicious aroma to the food cooked.
It is also known as the food of the gods and rightly so as it is a great digestive aid. It is used when cooking gassy vegetables and lentils. It prevents bloating and flatulence.

References:
http://en.m.wikipedia.org/wiki/Asafoetida

Food for thought:


Keep love in your heart. A life without it is like a sunless garden when the flowers are dead.Oscar wilde

Cucumber Kosumbari (Cucumber-Moong bean lentil salad)


Kosumbari in Kannada/Konkani are basically salads. These are dishes whose ingredients are raw and are seasoned with lemon juice, green chillies & salt.Cucumber Kosumbari is a relatively common one and is  a nice combination of vegetable with a little protein  hidden in it in the form of moong- bean lentil. It is quick and easy to make, healthy and tasty to eat.


Servings: 2


Ingredients:


Cucumber: 1 medium, peeled and finely diced.
Moong Dal(Moong- bean lentil): 1 tbsp
Green chilli: 1 small, finely chopped
Lemon juice: from one small lemon
Salt: to taste
Cilantro: 1 tbsp, chopped
Freshly grated coconut: 1 tbsp for garnishing.

For tempering:

Coconut Oil:1 tsp
Mustard seeds: 1/4 tsp
Curry leaves: 2-3 leaves
Hing( asofoetida): a pinch

Method:


Soak the moong-bean lentil for 30 mins in water. Drain and keep aside.

In a bowl mix together the moong-dal lentil, chopped cucumber, green chillies, salt, cilantro, lemon juice and freshly grated coconut.

Heat coconut oil in a small pan. Add the mustard seeds. Once the mustard seeds splutter, switch off the flame, add the curry leaves and a pinch of hing( asofoetida). Add it to the bowl.


Keep it refrigerated until ready to be served.

Enjoy.

Cooking made easy:


For those of us who don't have access to fresh curry leaves, here is a nice method to store large quantities of curry leaves for longer times. Wash and clean the leaves thoroughly and dry them in a single layer only until they are wilted ( not completely dry and brittle). Now store them in ziplock bags or in airtight container. Lasts for months together. I get my stock from India and it lasts for more than one year. You could use it just the way we regularly use. It becomes fresh when put in curries. You cannot tell the difference whether fresh or dried ones were used!

Tip for healthy living:


Studies have found a positive co-relation between gum disease and heart health. People who have gum disease are more prone to heart problems. Hence maintaining good oral hygiene is essential. This could be achieved by regular brushing, flossing and the use of antibacterial oral rinses. This should ideally be done after every meal.

References:
http://www.perio.org/consumer/heart_disease
http://www.huffingtonpost.com/2014/05/20/gum-disease-heart-disease_n_5352922.html
http://www.webmd.com/heart-disease/features/periodontal-disease-heart-health
http://www.nidcr.nih.gov/oralhealth/Topics/HeartDisease/
http://www.webmd.com/heart-disease/features/your-guide-gum-disease
http://www.webmd.com/oral-health/features/healthy-teeth-healthy-heart

Food for thought:

In order to be irreplaceable one must always be different. Coco Chanel

Saturday, September 6, 2014

Back to School Special: Charmuri Chikki ( Rice Crispy Squares)


It is that time of the year when we are busy sending our kids back to school! My daughter started Kindergarten today. This according to me is the official beginning of the formal education for my child... I guess for me too.. as this is my first advent with the public school system in the United States. I was educated in India mainly, and the instructional method is completely different from here. To make it even more complicated, my child is in the gifted and talented program, which means that it is a lot of work and learning for her and for me!! It is very hard to be a working mom. I had to take the day off yesterday so that I would be a part of this big milestone of my baby. I am the one dreading her schooling as it only adds to my work load! She was unperturbed, all excited! I wonder if I will have any time to spend blogging... Ok ok I guess I am getting carried away now.. Many moms before me have done this and survived, and I guess I will too..


Coming back to today's special, I figured "back to school" would be a perfect theme for this Fiesta Friday as all parents strive to provide their children with healthy snacks whether they are in kindergarten or in college! We always worry if our kids are eating enough and if it is nutritious enough! Today I am bringing to you a healthy, nutritious, natural, gluten-free, nut-free, easy to make snack. I came up with this recipe when I was making charmuri laddoos ( rice crispy balls) for Ganesh Chathurthi . It was quite out of necessity and desperation. To make the laddoos, you have to mix in the rice puffs in piping hot jaggery syrup and then shape them into balls while the mixture is still hot! If it cools down, you can no longer shape the mixture into balls. I figured that if I were to pour it into a tray and then cut it into squares it would save me a whole lot of time, not to mention the burning of my hand! Without further ado let me share the recipe. I love going to Angie's Fiesta Friday. Hilda@Along The Grapevine is co-hosting this week.


Servings: makes one 9x13 inch tray


Ingredients:


Jaggery: 2 cups
Puffed Rice : 8 cups ( you can also use rice crispies)
Cardamom powder: 1/4tsp
Water: 1/2cup

Method:


Dry roast the puffed rice until crispy, around 5-10 mins and keep aside in an airtight container.


Line a baking tray with parchment paper or wax paper and keep aside.

Heat jaggery and water in a pot until the jaggery is completely melted and liquid. Now turn off the heat, let it settle for  5 mins. Gently pour the molten jaggery into a thick-bottomed  pot, leaving behind any sandy residue.


Heat the molten jaggery on medium flame until it thickens and is sticky and stringy when attempting to pick to pour from a spoon. Turn off the flame.


Now mix in the cardamom powder and the toasted puffed rice a cup at a time. Mix well  and thoroughly  after the addition of each cup so that the jaggery coats each and every individual puffed rice grain and you have a nice golden mixture.If you feel that the jaggery is not coating the puffed rice or the mixture is more white than golden, then stop adding anymore puffed rice.

Pour the hot mixture into the prepared baking tray. Using a spatula gently press down to make it compact and even on top.


Cut into squares while still warm but don't remove it out. Once cooled down, separate the squares and store it in an air-tight container.


Stays fresh at room-temperature for upto a month.


Enjoy!

Cooking made easy:


If you don't have wax paper or parchment paper, just grease the tray with ghee or butter. Grease the sides too.

If you don't have a baking tray, put it in any regular metal square / rectangular tray.

Puffed rice softens and looses it's crispness when left in open air, hence it is essential to both dry roast it and then store it in an airtight container until it is ready to be used.

Tip for healthy living:


Traditionally jaggery has been used as a sweetener for several centuries now. It is also used in most Indian desserts and also in coffee and tea. Jaggery is a great alternative to white sugar. Both are made from sugar cane juice, the only difference being that jaggery is less processed and is more natural as opposed to white sugar. Simply put jaggery is nothing but sugarcane juice that has been boiled down until it solidifies.It can be used anywhere that sugar is used. Jaggery is also a good source of iron.

References:
https://www.organicfacts.net/health-benefits/other/jaggery-and-sugar.html
https://www.reliancegeneral.co.in/insurance/articles/year-2012/September/Say-No-to-Sugar-Opt-for-Jaggery.aspx
http://ayurveda.md/index.php?option=com_content&view=article&id=42&Itemid=1
http://www.thehealthsite.com/fitness/6-healthy-substitutes-for-white-sugar/

Food for thought:


Don't judge each day by the harvest you reap but by the seeds that you plant. Robert Louis Stevenson

Tille Undo/ Til Laddoo ( Sesame seed balls)


Laddoos are a very popular Indian dessert/ snack. Anything that is sweet and is shaped like a ball is a "laddoo". Undo is laddoo in my mother-tongue, Konkani. As kids we loves undos/ laddoos. These are usually made for all kinds of celebrations, festivals or any other auspicious occasion. There are hundreds of varieties of laddoos/undos. The basic method is pretty much the same: you make a sticky syrup out of jaggery, mix in the desired main ingredient and make balls out of it while the mixture is piping hot. The good part is that everything is natural and is a great source of instant energy. Today I am going to write about sesame laddoos which are extremely nutrient dense being rich in protein, fiber and makes for a great snack!


Servings: makes 15 small laddoos


Ingredients:


Jaggery: 1/2 cup
Sesame seeds: 1 cup
Cardamom powder: 1/8 tsp
Water:  2 tbsp

Method:


Heat jaggery and water in a pot until the jaggery is completely melted and liquid. Now turn off the heat, let it settle for  5 mins. Gently pour the molten jaggery into a thick-bottomed  pot, leaving behind any sandy residue.

Dry roast the sesame seeds for 5 mins and keep aside.


Heat the molten jaggery on medium flame until it thickens and is sticky when attempting to pick to pour from a spoon.


Now mix in the toasted sesame seeds and cardamom powder. Mix well .

Grease your palms with butter/ghee. Take small spoonful of the hot sesame mixture and shape it into balls of desired size. If the mixture cools down, you will not be able to shape it into balls.


Store in an air-tight container.
Stays fresh at room-temperature for upto a month.

Enjoy!


Cooking made easy:


The key for good laddoos is the stickiness of the jaggery. Not all jaggery are meant to be sticky. Back home, specific jaggery known as sticky jaggery is available in the store. Here in the US, I have found the Kolhapuri jaggery to be sticky enough for the laddoos.

How does one test if the jaggery has been boiled enough to be sticky enough for the laddoo?
We call it the string test. Take a drop of boiling jaggery and drop it in a glass of water. If the jaggery maintains its solid state and remains stringy it is the right consistency. If it sinks and dissolves in water, then you need to boil it some more until you achieve the stringy consistency.

Tip for healthy living:


Sesame seed is a wonderful source of protein for vegetarians with 4.7 gms of protein per ounce.It has a low glycemic index, hence is great for diabetics.It is rich in magnesium which is a key in lowering blood pressure. It is also rich in zinc which is good for the skin. It has phytosterols that help lower cholesterol and has anti-inflammatory properties due to the presence of sesamol in it. It also helps regulate the GI system as it is high in dietary fiber.In a nut-shell, it is a small seed that packs a punch!

References:
http://www.whfoods.com/genpage.php?tname=foodspice&dbid=84
http://www.care2.com/greenliving/20-health-benefits-of-sesame-you-wont-believe.html
http://www.nutrition-and-you.com/sesame-seeds.html

Food for thought:


That's the motivation of an artist- to seek attention of some kind. James Taylor


Charmuri Undo/ ChurmuriLaddoos ( Puffed Rice/Rice Crispie sweet balls)


Charmuri laddoos are a very popular snack back home. I used to love it as a child. Now I definitely make it atleast once a year, especially during festival season. It's simple and easy to make, healthy, a great source of quick energy and the kids love it! Charmuri is nothing but puffed rice also known as rice crispies here in the US.


Servings: makes around 16-20 large laddoos


Ingredients: 


Jaggery: 1 cup
Puffed Rice :  4 cups
Cardamom powder: 1/4tsp
Water: 1/4 cup

Method:


Dry roast the puffed rice until crispy, around 5-10 mins and keep aside in an airtight container.

Heat jaggery and water in a pot until the jaggery is completely melted and liquid. Now turn off the heat, let it settle for  5 mins. Gently pour the molten jaggery into a thick-bottomed  pot, leaving behind any sandy residue.

Heat the molten jaggery on medium flame until it thickens and is sticky when attempting to pick to pour from a spoon.


Add the cardamom powder. Now mix in the toasted puffed rice little at a time, mixing it well each time you add in ensuring that all the puffed rice is evenly coated with jaggery syrup.

Grease your palms with butter/ghee. Take tablespoonful of the hot puffed-rice- jaggery mixture and shape it into balls of desired size. If the mixture cools down, you will not be able to shape it into balls.


Store in an air-tight container.
Stays fresh at room-temperature for upto a month.


Enjoy!

Cooking made easy:


While making laddoos, if you find that  you are not able to shape it into a ball inspite of the good stringiness and stickiness of the jaggery, then warm the dish a little, the jaggery will melt and be sticky once more!

It is much easier to make big laddoos than small ones as these laddoos are very light.

Tip for healthy living:


Puffed rice makes for a great snack as it is light, low in calories , nut-free and  gluten-free.

Snacking is a great habit as long as the snacks are healthy. One should eat several small meals a day rather than 2-3 large heavy meals. Eating small portions often keeps the metabolism going and also keeps us from binging!

References:
http://healthyeating.sfgate.com/benefits-snacking-2874.html
http://www.everydayhealth.com/diet-nutrition/meal-planning/healthy-snacking-benefits.aspx
http://www.livestrong.com/article/392588-why-are-healthy-snacks-important/


Food for thought:


 Love is an irresistible desire to be irresistibly desired. Robert Frost

Monday, September 1, 2014

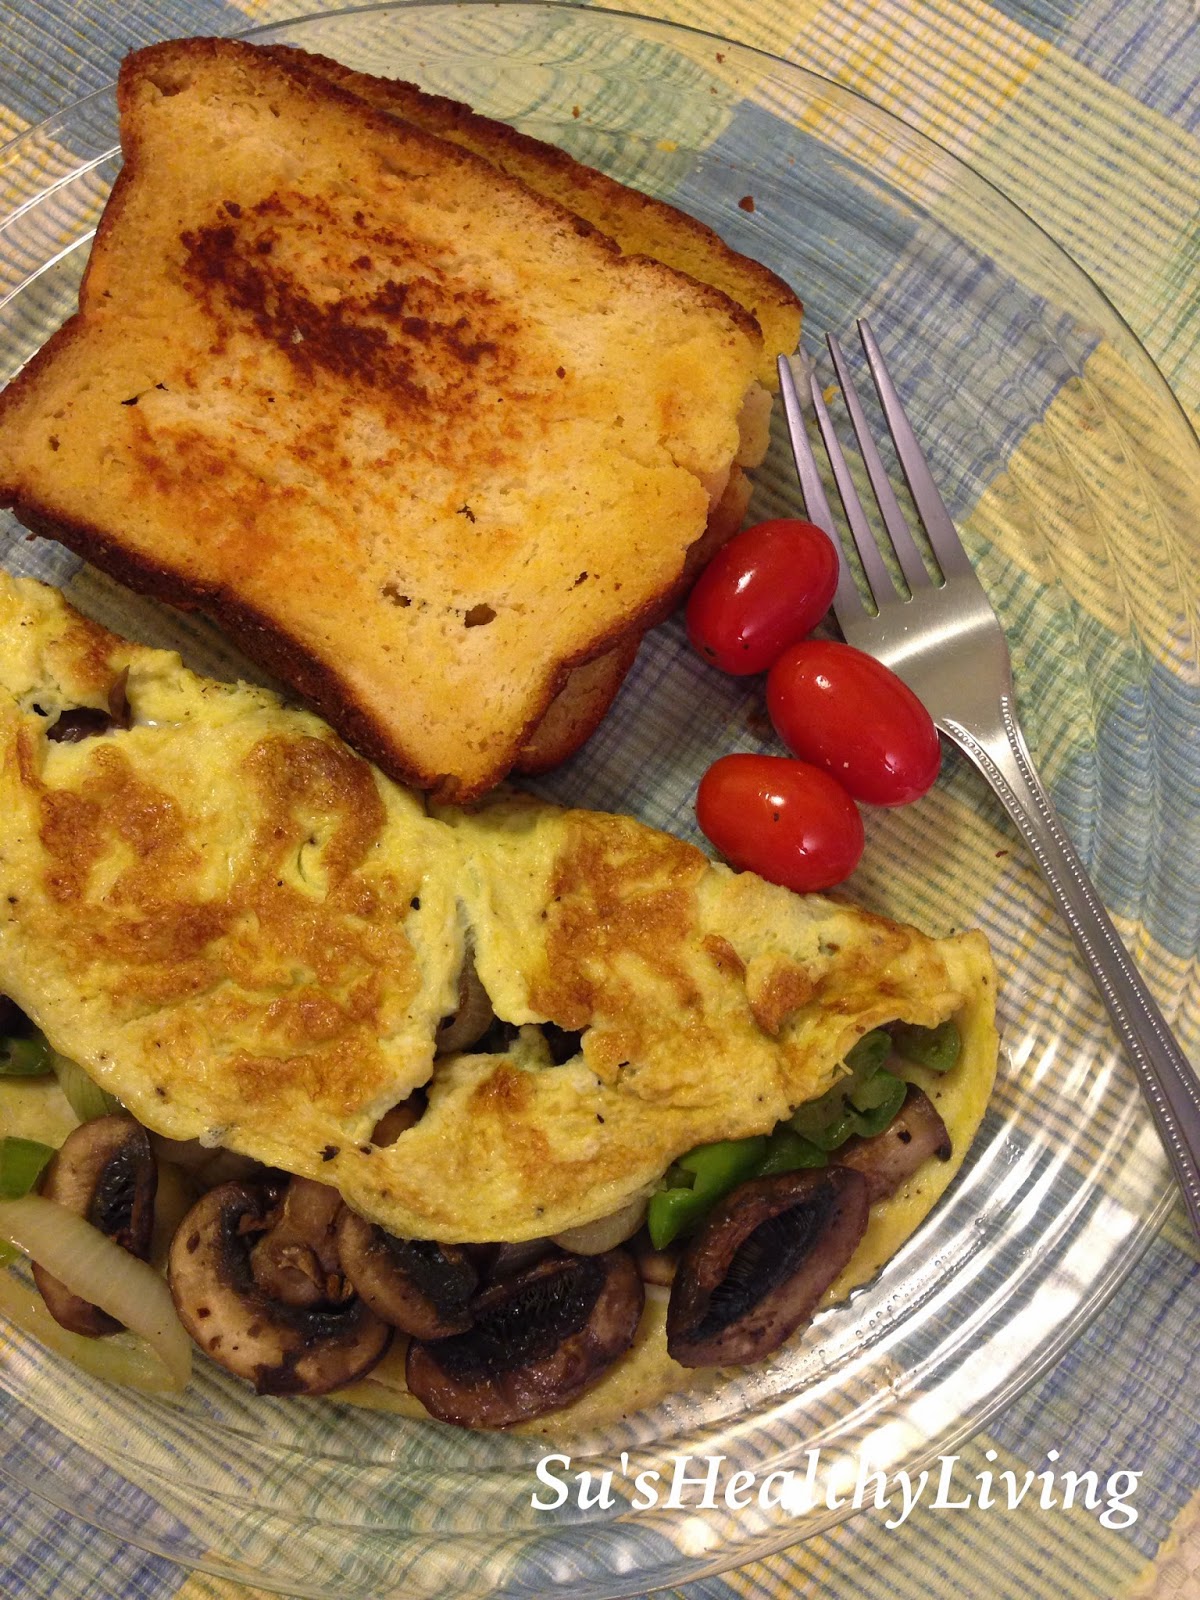
Meatless Monday Stuffed Omelette


One of my all-time favorite, indulgent  and filling breakfast is the Stuffed Omelette stuffed with a variety of vegetables like mushrooms, spinach, peppers, onions, tomatoes and sprinkled with shredded cheese served with bread toasted golden brown and a dollop of butter. Truly indulgent right?? But yummy and delicious! It is my weekend special and extra- special because my husband makes it for me. Once a week, during the weekend he makes this lovely omelette for me for breakfast as an appreciation for all my week-long cooking. I must say that I appreciate it and enjoy and relish every last bite of it!

Servings: 2


Ingredients:


Bread: 4 slices( 2 each)
Butter: enough to lightly spread on 4 slices of bread and 1/2 tsp each to cook the omelette.( you can use oil instead of butter for cooking the eggs if you choose).
Organic eggs: 4 large or extra-large eggs ( 2 each)
Onion: one medium, chopped .
Tomatoes: 1 small, chopped
Bell pepper: 1 small, sliced thin, lengthwise.
Mushrooms: 10-12, small, sliced thin. I used baby Bella, any edible mushroom can be used.
Oil: 1 tsp
Salt: to taste
Milk: 2 tbsp
Pepper: 1/4 tsp + 1/4 tsp ( for the vegetables and the eggs)
Grated Cheese: 2 tbsp ( I used mozzarella), any cheese can be used.

Method:


Heat a oil in a frying pan/ skillet. Saut� onions until they wilt, add in the tomatoes, then the mushrooms and the bell peppers and saut� for 1-2 minutes. Add salt and freshly ground pepper.


Beat 2 eggs with 1 tbsp milk until frothy.

Toast the bread, butter it and keep it ready in the serving plate.

Heat a griddle/ skillet on medium heat. Smear butter, add the beaten eggs. Sprinkle salt and freshly ground pepper as per taste. When done, flip it to cook the other side.


As soon as you flip it, place the cooked vegetables on one half of it. Sprinkle the grated cheese.Fold the omelette and let it set for 10-15 seconds. Slide it onto the serving plate.


Eat it immediately when hot.


Enjoy!

Cooking made easy:


Eggs should never be overcooked or cooked until it is brown. Eggs taste the best when soft and fluffy. For this they have to be cooked right.

Using butter or margarine to grease the skillet while cooking eggs, helps prevent the eggs from getting burnt. Also the flame should be maintained at medium while heating the pan and medium-low while cooking the eggs.

To ensure that the eggs are evenly cooked, lift the omelette in between so the liquid egg on top can slide to the bottom and get cooked.

Never attempt lifting the finished omelette. Always, gently slide it onto the serving plate.

Tip for healthy living:


For a long time there was this huge anti-butter campaign stating  that butter is bad for you. People switched to artificial butter-like products which have more harmful effects on the body than butter. Now doctors are promoting the use of butter, in moderation of course! Too much of anything is bad for you!

References:
http://newyork.cbslocal.com/2014/07/18/seen-at-11-butter-making-a-comeback-as-new-study-suggests-health-benefits/
http://articles.mercola.com/sites/articles/archive/2014/03/24/butter-consumption.aspx
http://draxe.com/top-8-health-benefits-of-butter/

Food for thought:


Old friends pass away, new friends appear. It is just like the days. An old day passes, a new day arrives. The important thing is to make it meaningful: a meaningful friend or a meaningful day. Dalai Lama