Friday, July 25, 2014

Mushroom Chilli


It is Friday! Friday means party.. time to party at Angie's Fiesta Friday. Today, I bring something spicy and yummy to the party...Mushroom Chilli. I hope everyone likes it.If you have not been to Angie's Fiesta Friday, I strongly suggest that you come once. You will be hooked!


I love mushrooms.Apart from several important nutrients like niacin, riboflavin, potassium and vitamin D, mushrooms are also rich in selenium which is an antioxidant . I like Chinese food but since I rarely eat out, I make most of them at home and in a much more healthier manner.Mushroom chilli is a favorite in my household. It is simple, quick and easy to make and absolutely delicious!


Servings: 4


Ingredients:


Mushrooms : One 8 oz package of Cremini or Baby bella,sliced 0.5 cms thick.
Onions: 1 medium,  diced medium
Garlic: 4 cloves,cut julienne
Ginger: 1 inch, cut julienne
Green chilli: 3,chopped fine
Bell pepper:1 large,diced medium( can use any color)
Soy sauce:2-3 tbsp
Vinegar: 1 tbsp
Corn flour/ corn starch:1 tbsp
Spring onions: 3,chopped fine
Olive Oil:2 tbsp
Sugar: pinch
Salt: to taste

Method:


Mix corn starch and soy sauce and keep aside.

Heat a wok on high heat,add oil. When oil  is hot, add garlic , then ginger. Saut� for 30 secs, then add chopped onions, saut� for 1-2 mins. 

Now add green chillies, bell pepper and then mushrooms. Saute for 2 minutes.

Now add salt, sugar and the cornstarch-soy sauce mixture and mix well. Let it cook for another 3-4 mins. 

Add vinegar and mix well.

Garnish with chopped spring onions.

Serve hot with jasmine rice!

Cooking made easy:


Avoid using wooden cutting boards to chop onion or garlic. The smell of the onion/ garlic never goes away from the cutting board.

Always wash the knife immediately after chopping onions or garlic. Not doing so will dull the blade of the knife.

Tip for healthy living:


One of the best ways to exfoliate your skin regularly is dry scrubbing.
Use a dry brush and thoroughly brush your skin before bathing. This not only gets rid of the dead skin, it apparently also increases the blood flow to the skin and also is purported to get rid of impurities from the body.
The end result is apparently radiant looking skin. Of course avoid dry brushing the delicate skin of the face.
References:
http://m.huffpost.com/us/entry/1811708/
http://m.wikihow.com/Dry-Brush-Your-Skin
http://www.mindbodygreen.com/0-7955/why-you-should-start-dry-body-brushing-today.html
http://articles.mercola.com/sites/articles/archive/2014/02/24/dry-skin-brushing.aspx


Food for thought:


FEAR has two meanings: ' Forget Everything And Run' or Face Everything And Rise'. The choice is yours. Zig Ziglar

Wednesday, July 23, 2014

Vern ( Sprouted Moong Bean Rasam/Saaru/ Soup)


Whenever I make muga ghashi at home, I somehow always end up making "vern"."Vern"( pronounced like fern with a "v"), is nothing but rasam/ saaru made by grinding cooked moong beans with coconut and chillies. For those who are unfamiliar with saaru, "saaru " is something liquidy like soup that is traditiobally served as an accompaniment to rice in Southern India. It is actually served over plain rice so that the rice does not have to be eaten dry. There are several varieties of saaru and this is just one of them. I am very fond of Vern and hence save some of the cooked moong beans and peel when I cook it for the muga ghashi and make this flavorful soup.

Servings: 6


Ingredients:


Cooked moong beans: 1/2 cup
Cooked moong bean peel: 1/2 cup
Grated fresh coconut: 1/2 cup
Red chilli: 2
Tamarind: marble sized if using dry, 1/2 tsp if using pulp.
Jeera( Cumin seeds): 1/4 tsp
Raw rice: 1 tbsp
Haldi( turmeric powder): 1/2 tsp
Green chillies: 2-3, slit lengthwise
Salt: 1 tsp
Water: 1/2 cup + 3 cups

For tempering:

Coconut oil: 1 tsp
Jeera ( Cumin seeds): 1/4 tsp
Mustard seeds: 1/2 tsp
Curry leaves: 1 sprig

Method:


Grind together freshly grated coconut, tamarind, red chilli,turmeric and 1/4 cup water to a fine paste. When almost done add the cumin seeds and raw rice and grind. When that is done, add in the moong beans , peel and 1/4 cup water and grind to a fine paste.


Pour this paste into a cooking pot. To this add slit green chillies and salt and bring it to a boil. When it comes to a boil, switch off the flame and prepare for tempering.

Tempering:


Heat 1 tsp coconut oil in a small saut� pan, add the jeera first and then the mustard seeds. When all the mustard seeds crackle, add the curry leaves and switch off the flame. Add this to the above pot.


Serve  hot with rice.


Enjoy!

Cooking made easy:


Always immediately clean the knife with soap and water after you chop onion/garlic or potatoes. Not doing so will blunt your knife edge faster.

Tip for healthy living:


Regularly massaging your scalp with warm oil can help prevent hair fall. In fact it is supposed to promote hair growth. Make sure you leave the oil in for at least 30 minutes before you wash your hair. Massaging the scalp improves the blood circulation to the scalp. It also supposedly helps relieve headaches.Applying oil to the hair helps condition them and prevents it from being dry which in turn may prevent split-ends.


Food for thought:


Do not seek to follow in the footsteps of the wise.Seek what they sought. Matsuo Basho

Monday, July 21, 2014

Meatless Monday Creamy Garbanzo bean (Chickpea) Salad


Summer =Salads! Period. That's for me. I love to eat salads throughout the year but especially during summer as I don't really feel like eating anything too hot. I like something cool. Also during summer we are outdoors most of the time, especially during the weekends. We don't like to eat out much and therefore pack a picnic for our outings! This of course includes a salad. And so I am making a myriad of salads during the summer! Summer and going out also means going to barbecues.. This weekend we had a barbecue at a dear friend's beech house. The kids had a blast! I made a creamy chickpea salad for the occasion and saved a bowl for me for today's lunch. This is another one of my crowd-pleasers!I came across this recipe a year ago and as often, I have tweaked it a little.You can find the original recipe here. Do try it, you will surely like it! ( unless you don't like chickpeas at all to begin with ;). This is how I made it:


Servings: 4


Ingredients:


Chick peas( garbanzo beans): 1 15oz. can, rinsed and drained thoroughly.
Cucumber: 1 small, diced.
Tomato: 1 medium, deseeded and diced.
Onion: 1 medium, chopped fine( I used yellow onion, any onion can be used).
Green bell pepper:1 medium, deseeded and diced.
Apricots: 2 small, deseeded and diced.
Black olives: 1/4 cup, sliced
Cranberries: 1 tbsp
Parsley: 1/8th cup, chopped fine.
Feta cheese: 2 oz, crumbled.

For the marinade:
Greek yogurt: 1/4 cup
Lemon juice: 1 tbsp
Apple cider vinegar: 1 tbsp
Honey:1 tsp
Sea salt: as per taste
Black pepper: 1/2 tsp, freshly ground.

Method:


Add all the ingredients( except those listed under "for the marinade") into a salad bowl.

Take all the ingredients listed under "for the marinade" in a small glass jar and shake well.

Add the marinade to the salad bowl and mix well.


Garnish with some parsley sprigs, olives and cranberries.


Keep it chilled until ready to serve!


Enjoy!

Cooking made easy:


Salads like this are great for a party or gathering as they can be made ahead of time( like the night before).Just mix all the ingredients of the salad and prepare the marinade, but keep them separately.
On the day of the party, just before the guests arrive, you can mix the marinade with the salad and it is ready to be served.

Tip for healthy living:


Yogurt has been traditionally used as a salad dressing in India. Yogurt is a great probiotic and hence helps in maintaining good GI health. Probiotics are food groups that promote the growth of good bacteria in the gut. These good bacteria not only aid digestion and thereby prevent digestive issues like bloating and constipation, they also help promote good immunity in the body. Greek yogurt is higher in protein content than regular yogurt.Hence, a small cup of yogurt daily will contribute in a big way to better health.

References:
http://www.health.harvard.edu/fhg/updates/update0905c.shtml
http://foodmatters.tv/articles-1/6-healing-benefits-of-probiotics
http://www.webmd.com/digestive-disorders/features/what-are-probiotics


Food for thought:


Show respect even to people who don't deserve it; not as a reflection of their character,but as a reflection of yours. Dave Willis

Saturday, July 19, 2014

Watermelon Cake


I have eaten a myriad variety of cakes during my lifetime... But Watermelon Cake??? Never before! I bet you have not either!I have to confess, out of all the cakes I have so far eaten, this is one cake I would eat again and again and again.. I bet you would too... That too without feeling guilty!


I came across this wonderful cake on Facebook when it was shared with me by one of my friends who knows I avoid gluten and eat healthy most of the time.I immediately fell in love with the idea of this cake! How clever of whoever originally thought of it! You can find the original recipe here.


Summertime, my home has a constant flow of guests. Currently, my sister-in-law is visiting us with her two kids. My 5-year old daughter and 8-year old niece had tons of fun making this cake, of course with help from me ( hence the cake is a little askew, the decoration on the cake trying to push free.. But, hey, I am not complaining...it kept them occupied for almost an hour! Believe it or not, the cake was gone within 20 minutes of making it and everyone took seconds too.. 


Without further ado, I bring to you the recipe for the guilt- free Watermelon Cake. I am taking this cake to Angie's Fiesta Friday who's co-hosts this week again are Hilda @ Along the grapevine and Julianna @ Foodie on Board.We have so much fun at Fiesta Friday!

Servings: 6( I made a 6-inch cake)


Ingredients:


For the cake:
Watermelon: 1 medium sized
Sliced almonds: 1 cup
Craisins: 1/4 cup
Strawberries: 4-6 nos
Blueberries: 1/2 cup 
Red cherries:5 nos
Rainier cherry: 1

For the frosting:Whipping cream: 2 cups
Sugar: 2 tbsp

Method:


The frosting: Place a metal bowl and whisk in the freezer for atleast 15 minutes.


Make sure that the whipping cream is also cold( not frozen).

Add 2 tbsp sugar to the cold bowl. Add the cream in and using an electric beater/ whisk whip it for 1 1/2-2 mins or until stiff peaks start appearing.

Place it in the refrigerator until ready to use.

The cake:

Slice off the ends of the watermelon so that you end up with an equal sized  symmetrical central cylinder.

Slice  the outer peel of the cylinder.


Place the central cylinder on a serving plate.

Pat the watermelon dry with paper towels so as to get rid of the excess moisture.

Now ice the watermelon with the whipped cream frosting.


Decorate the sides of the cakes with sliced almonds and the top with fresh berries as shown in the picture. You could decorate it any which way you want. I have lined the bottom of the cake with a ring of Craisins.


Refrigerate the cake until ready to serve.


Once the cake is sliced, serve immediately as the watermelon tends to leave water and the frosting starts melting as shown in the above picture.


Enjoy this beautiful guilt-free cake!

Cooking made easy:


You could pick any fruits to decorate the above cake. Use your imagination!

For a nut-free cake you could substitute nuts with granola or some other cereal like corn-flakes.You could also decorate the sides with Craisins.

The pieces leftover from cutting the watermelon could be used to make watermelon juice or smoothie. So refreshing!

Tip for healthy living:


I always emphasize on filling 3/4 ths of your meal plate with fruits and vegetables. While that is important it is also important to buy good fruits and vegetables that are locally and/or organically grown. Locally grown produce is fresher and leaves fewer carbon footprints. Eating organic food is important to avoid accumulation and the effects of pesticides and chemical fertilizers in our bodies.

So what is organic produce?? Organic produce is produce that has been grown without the use of chemical fertilizers and minimal pesticide use. One automatically thinks: organic produce is expensive!  Not all produce needs to be organic. It is essential to know which produce could be eaten without it being grown organically and is still safe and which fruits and vegetables have the highest chemical content in them and hence is better consumed when organically grown.

A simple rule of thumb is that any produce that needs to be peeled to be consumed, need NOT be organic. This is because the peel is where most of the pesticide accumulation is seen. Here the knowledge of the "dirty dozen" and the " clean fifteen" comes in handy. The dirty dozen are the fruits an vegetables that have been found to have the highest accumulation of pesticides and hence is better to consume the ones grown organically. Similarly the clean fifteen are the produce that have the least chemical residue in them and we don't have to worry about buying them organic.

The full Dirty list: Apples, strawberries, grapes, celery, peaches, spinach, sweet bell peppers, imported nectarines, cucumbers, cherry tomatoes, imported snap peas and potatoes.

The Clean list: Avocados, sweet corn, pineapples, cabbage, frozen sweet peas, onions, asparagus, mangoes, papayas, kiwis, eggplant, grapefruit, cantaloupe, cauliflower and sweet potatoes.
Mind you, FDA has repeatedly stated that all chemical residue that is found in produce in the United States is within the "safe limits". Here is an interesting titbit: FDA keeps raising the "acceptable chemical limit" every year! That should tell you something!

References:

http://www.fda.gov/iceci/compliancemanuals/compliancepolicyguidancemanual/ucm123236.htm
http://www.ewg.org/foodnews/
http://www.ewg.org/foodnews/list.php
http://www.goodhousekeeping.com/_mobile/recipes/healthy/dirty-dozen-foods#slide-1
http://m.huffpost.com/us/entry/5246989
http://blogs.seattletimes.com/allyoucaneat/2014/04/29/which-dirty-dozen-fruits-and-vegetables-made-the-2014-list/

Food for thought:


With the new day comes new strength and new thoughts. Eleanor Roosevelt

Friday, July 18, 2014

Muga Ghashi ( Sprouted Moong beans in coconut sauce)


Muga ghashi is a favorite in konkani households. It is my mother's all-time favorite. She pretty much makes it every other week. So what exactly is this dish? "Mugu" is moong beans in konkani and "ghashi" refers to the kind of coconut sauce it is in. Mugu here spegifically refers to the sprouted moong beans that are so tiny to begin with. Think of the sheer amount of work that it takes to peel each single one if them! I know of only one person who diligently does it! Who?? My mother of course!! She will sit and patiently peel each and every one of them! Can you believe that?? Well she does! This is the deal with her. She does not like a single moong bean peel in her muga ghashi. You will never see a hint of green in her muga ghashi. Now are you wondering if I have taken over my mother's skills?? NO! I could not have such patience in a million years!! I have adopted my mother-in-law's policy. Cook the sprouted moong with the peel! Ha ha! And to think that I used to hesitate to make this favorite dish of mine just thinking about the sheer amount of work! Now I get some fiber too in my diet:). When you cook the sprouts in water, the peel floats up top. You can scoop the peel and remove it. Whatever peel is left, you eat. But the authentic way to make this dish is by removing the individual peel from all the moong beans. Remember, your mother is always right!

Now, for this dish you could add any of the following as an accompaniment: suran( yam), keerlu( tender bamboo shoots), bikand(jackfruit seed),kook( chinese potato), cauliflower, tendle( gherkin), simebadane( chayote) or even potato. Each one gives the dish a nice unique taste. My favorite is with the tender bamboo shoots and with Chinese potatoes. Today, I will share with you the dish I made by combining sprouted moong beans with tender bamboo shoots.


Servings: 4-6


Ingredients:


Sprouted moong beans: 3 cups
Tender bamboo shoots: 1 cup, cleaned and chopped into medium pieces.
Salt to taste.
Water: 2 cups + 1 cup

For the coconut masala/gravy/ sauce:

Grated fresh coconut: 1 cup
Dry Red chillies:4-5 nos ( depends on the spice level of; the chilly).
Tamarind: marble sized if dry, 1/2tsp if pulp.
Water: 3/4 cup( can add more if needed)

For tempering:Mustard seeds: 1 tsp
Curry leaves: 1 sprig
Coconut oil: 1 tsp ( any cooking oil can be used.)

Method:


Grind all the ingredients listed under coconut gravy and keep aside.


Cook sprouted moong beans with 2 cups water in a pot on medium flame until tender. Generally around 20-25 minutes. Keep aside.


Cook tender bamboo shoots with 1/2 cup water in a pot until tender.Around 8-10 minutes. Keep aside.


When all the above are ready, mix it all together in pot big enough to hold it all. Now place it on medium heat and bring it to a boil. Once boiled, switch of the flame. Temper with the ingredients listed under tempering.

Tempering:

In a small frying pan, heat coconut oil, add mustard seeds. Once the mustard seeds splutter, add the curry leaves.Add it to the above pot.


Note: some people add 1/4 tsp jeera( cumin seeds) to the tempering.

Some people temper with fried chopped onions. I prefer the taste of mustard and curry leaves.

Serve hot with rice.

Enjoy!


Cooking made easy:


One of the easy ways to peel the skin off the sprouted moong beans is by soaking it in water. Soak the sprouts in cold water for 3-4 hours. You will see the the peel separates from the seeds and floats up on top. Scoop it up. There might be a few stubborn ones that might be required to be manually peeled.

Tip for healthy living:


Sprouts are very nutrient-dense.Apparently the quality of the protein, the fiber content, essential fatty acid content  and vitamin content in the beans improves upon sprouting. There are 100 times more enzymes in sprouts than uncooked fruits and vegetables.They are easy to make at home, and are by far the best locally-grown food.
References:
http://www.care2.com/greenliving/10-reasons-to-eat-sprouts.html
http://www.sprouts-as-medicine.com/
http://articles.mercola.com/sites/articles/archive/2013/04/08/eating-sprouts.aspx

Food for thought:


Absence- that common cure of love. Lord Byron

Thursday, July 17, 2014

Paper Masala Dosa ( Gluten-free stuffed Crepe)


The ambition of anybody who loves making and eating Masala Dosa is to get it to be crispier and more perfect than before.For those who don't know about "masala dosa", "masala" means stuffing and "dosa" means crepe.Basically it is stuffed crispy crepe. But in this case, the crepe is paper-thin! While my Masala Dosas come out well, a few months ago I came across this recipe for Paper Masala Dosa. The batter was different from what I made and used several different types of dal. I was intrigued. Not just for the concept of having a crispier, thinner dosa but due to the use of multiple lentils. I am always looking for ways to make my kids meals protein-rich and this seemed to be perfect! Even if the dosas didn't turn crispy, I still would have healthy dosas for my kids. They love dosas. Well, the dosas came out perfect! I absolutely fell in love with them. The recipe was shared by an innovative cook, one of my favorites Seema D.Shenoy. She has a Facebook page called DineDivine.

Servings: 6


Ingredients:


For the Dosa batter:
Rice: 2 cups
Urad dal: 1/4 cup
Chana dal: 1/4 cup
Moong dal: 1/4 cup
Tur dal:1/4 cup
Methi ( fenugreek) seeds: 1 tsp
Soak all above ingredients in water for 5-6hours.
Water: to grind the batter.
Salt: to taste

For the bhaji (stuffing):

Potatoes : 3 medium
Onion: 1 big, chopped small.
Green chillies: 2 slit lengthwise
Mustard seeds: 1/2 tsp
Urad dal: 1/2 tsp
Chana dal: 1/2 tsp
Jeera(cumin): 1/4 tsp
Haldi( turmeric powder):1/2 tsp
Curry leaves: 1 sprig
Oil: 1 tbsp
Cilantro ( coriander leaves) 5-6 sprigs
Salt to taste

For the chutney:

Grated fresh coconut: 1 cup
Green chilli: 1
Red chilli ( dry): 2
Ginger: 1/4 inch
Tamarind: marble sized
Chana dal: 1 tsp
Oil: 2 drops for saut�ing
Salt to taste


Method:


For the dosa batter:

Grind all the ingredients  listed under dosa batter to a fine paste. The batter should not be runny. Let it ferment for at-least 8 hours or overnight.

Next morning just before making the dosa, add salt to taste. Mix well.

The stuffing( bhaji):

Boil potatoes till tender. When cooled, peel and dice it into 1cm cubes and keep aside.

Heat a kadai/ saut� pan on medium heat. Add oil,temper mustard seeds. The add curry leaves, jeera,chana dal, urad dal one after the other and saut� till urad dal turns a little golden brown. Now add the slit green chillies and the chopped onions. Saut� until onions turn transparent. Now add haldi and saut� for 1 more min. Add the diced potatoes and saut� for 2-3 mins. Garnish with finely chopped cilantro leaves.

The chutney:
Saut� chana dal in one drop of oil until golden brown. When cooled, grind it together with grated coconut, green chilli, red chili, ginger,tamarind, salt and water into a thick paste.

Putting the  Paper Masala Dosa together:
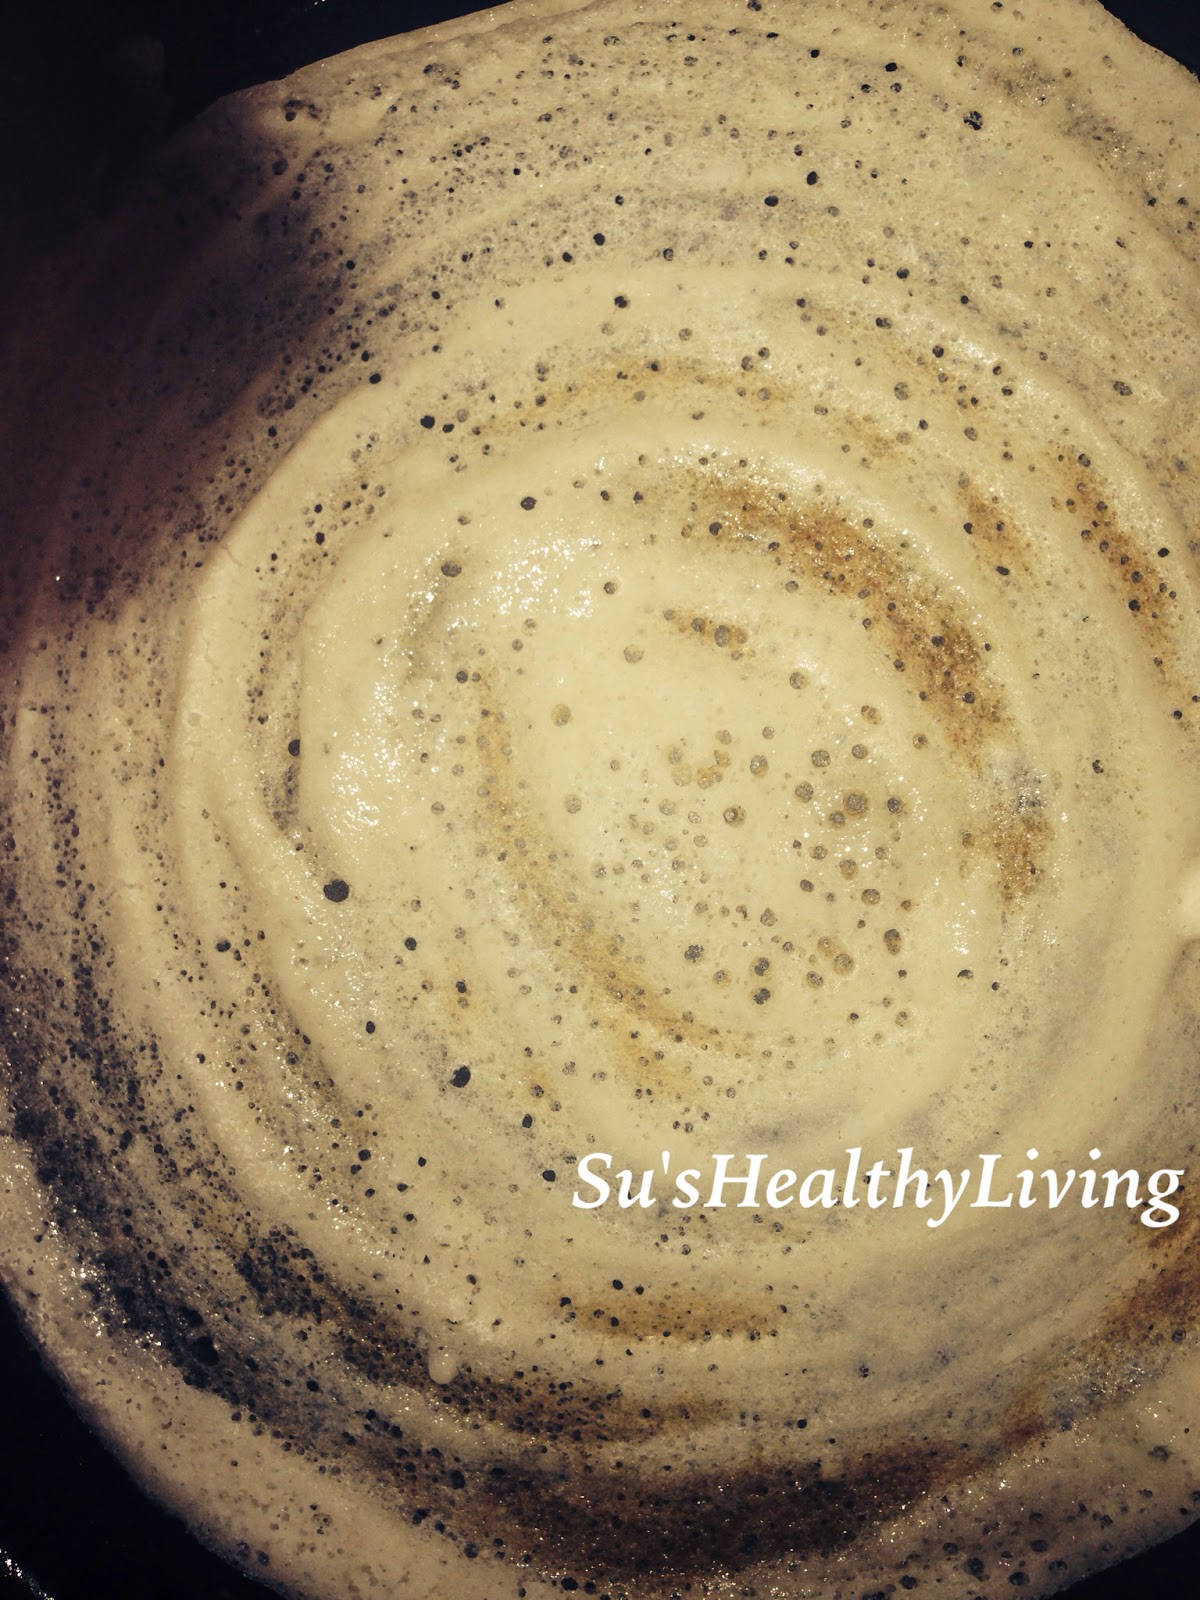
Heat the skillet/tawa/griddle on medium-high flame. When the skillet is hot, sprinkle cold water. Take a ladle of dosa batter and go in concentric circles from the center to the periphery of the skillet.


When the dosa is slightly done lightly smear oil along the edges and the center of the dosa. Wait for it to turn crispy. 


Once this happens, smear the red chutney at the center of the dosa and place a tbsp of the potato bhaji. 


Now fold the dosa into a roll as shown in the picture.This dosa is cooked only from one side and is not flipped.

Serve hot with any chutney of your choice and  sambar. I have served with just  ridge-gourd peel chutney in the first and radish sambar in the second. 


Enjoy!


Cooking made easy:


Always make extra batter enough for 2 breakfasts.The above dosa batter can be used to make plain paper dosa the next time. Serve it with chutney of your choice.

You can also be versatile with the stuffing you make. You could use mushroom bhaji or paneer stuffing.

Tip for healthy living:


Fermented foods are a good source of probiotics. Probiotics are needed to promote good health of the gastrointestinal system. Probiotics are the good bacteria in the intestine that help digestion and prevent bloating, constipation and diarrhea.Good sources of probiotics include yogurt, kimchi, saurkert etc.
References:
http://www.medicalnewstoday.com/articles/264721.php
http://www.health.harvard.edu/fhg/updates/update0905c.shtml
http://www.webmd.com/digestive-disorders/features/what-are-probiotics
http://foodmatters.tv/articles-1/6-healing-benefits-of-probiotics


Food for thought:


Laughter is the best medicine.(unknown).